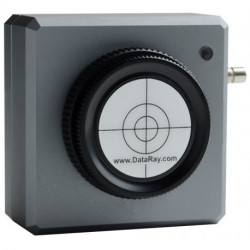
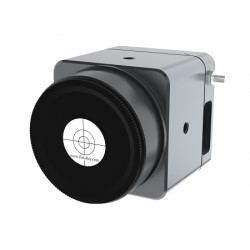
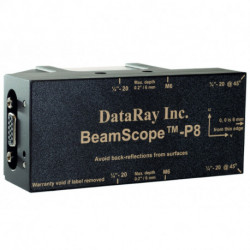
BeamScope P8, linear Scan
Reference: DAT-BeamScope
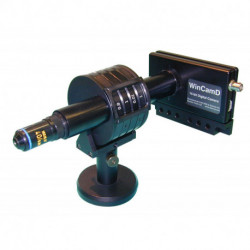
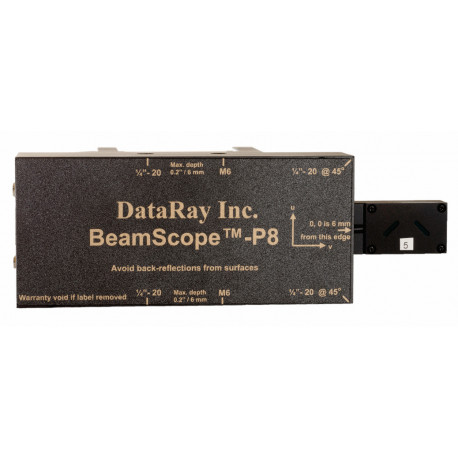
The unique in the linear scanning system BeamScope P8 is the measuring tongue of the detector. To move perpendicular to the beam propagation direction through the beam and thus performs a linear scanning motion.
- Download
- Send to a friend
- Remove this product from my favorite's list.
- Add this product to my list of favorites.
Product description
Linear Scanning System BeamScope P8
Now with USB 2.0 Interface!
Description
The unique feature of the BeamScope is the linear moving scan-finger.This finger is moving perpendicular through the beam, giving a linear movement. The geometrical dimension of measurable sources is limited only by the mechanical scan range and reaches 120 µm up to 25 mm with single slits or pinholes.
Two detectors are located on the scan finger directly behind the exchangeable slits. This design allows one to use small detectors, even when larger sources have to be scanned. Additionally, the same part of the detector is always used, which eliminates the influence of detector nonlinearities on the measured intensity profile. Easy alignment is guaranteed, because the slits are directly visible during the alignment process.
Due to the narrow scan finger the BeamScope can measure the intensity profile also between optical components. The linear stepper motor driven movement allows the application of the BeamScope with cw lasers but also in combination with pulsed systems (pulse repetition rate > 5 kHz).
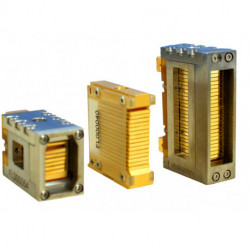
The BeamScope P8 is ideally suited to measure smallest spot size diameters and to characterise the intensity profile of laser diodes, laser diode arrays and large stripe laser diodes.
Highlights
Options
The standard configuration comes with a mounted XY slit pair. This gives the opportunity to measure the X- and Y-profile during only one scan (max. beam diameter is 5 mm). There are different slits with 2.5 / 5 / 10 / 25 or 100 µm width (7 mm length) available. In dependence of the intensity profile the different sizes allow to measure in scanning-slit mode or in knife-edge mode. As an option an extra long scan finger can be provided.
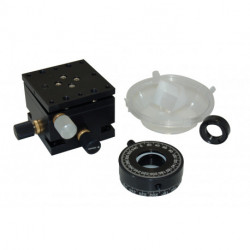
The BeamScope is available with different detectors (Si-, Ge, extended InGaAs, InAs diodes) which cover different wavelength ranges from UV to MID-IR. As an option the system can be upgraded by a linear translation stage to allow measurement of the M2 factor as well as a 2D raster scan of large beams.
The driver of this stage is also USB-based.
We are happy to offer a free product demonstration within Germany/Austria/Switzerland. In case of interest please contact Laser 2000 by phone or mail to arrange a presentation.
Now with USB 2.0 Interface!
Description
The unique feature of the BeamScope is the linear moving scan-finger.This finger is moving perpendicular through the beam, giving a linear movement. The geometrical dimension of measurable sources is limited only by the mechanical scan range and reaches 120 µm up to 25 mm with single slits or pinholes.
Two detectors are located on the scan finger directly behind the exchangeable slits. This design allows one to use small detectors, even when larger sources have to be scanned. Additionally, the same part of the detector is always used, which eliminates the influence of detector nonlinearities on the measured intensity profile. Easy alignment is guaranteed, because the slits are directly visible during the alignment process.
Due to the narrow scan finger the BeamScope can measure the intensity profile also between optical components. The linear stepper motor driven movement allows the application of the BeamScope with cw lasers but also in combination with pulsed systems (pulse repetition rate > 5 kHz).
The BeamScope P8 is ideally suited to measure smallest spot size diameters and to characterise the intensity profile of laser diodes, laser diode arrays and large stripe laser diodes.
Highlights
- High spatial resolution of 0.1 µm
- Easy and fast change of slits and apertures
- Pinholes, XY- and Single slits with different width
- Different detectors available to match the source wavelength
- Upgrade to complete M2 measurement
- 12 Bit digitalisation
Options
The standard configuration comes with a mounted XY slit pair. This gives the opportunity to measure the X- and Y-profile during only one scan (max. beam diameter is 5 mm). There are different slits with 2.5 / 5 / 10 / 25 or 100 µm width (7 mm length) available. In dependence of the intensity profile the different sizes allow to measure in scanning-slit mode or in knife-edge mode. As an option an extra long scan finger can be provided.
The BeamScope is available with different detectors (Si-, Ge, extended InGaAs, InAs diodes) which cover different wavelength ranges from UV to MID-IR. As an option the system can be upgraded by a linear translation stage to allow measurement of the M2 factor as well as a 2D raster scan of large beams.
The driver of this stage is also USB-based.
| Parameter | Specification |
| Measurable sources: | cw, pulsed sources> 5kHz rep. rate @ 5% Duty Cycle, higher PRR is better |
| Detectors: | Wavelength Range |
| Si-Detector: | 190 - 1150 nm |
| Ge-Detector: | 800 - 1800 nm |
| ext. InGaAs-Detector ø3 mm: | 1000 - 2400 nm |
| InAs-Detector ø2 mm: | 1.5 - 4 µm |
| max. optical power: | 6µW - 3W @ 1mm Ø and 633 nm, 5µm slitsfor details please contact |
| Dynamic range: | 44 dB |
| Measurement range: | 0.5 µm to 25 mm (aperture dependend) |
| Resolution: | 0.1 µm or 0.5% of beam diameter |
| Accuracy: | ±1 µm or ±2% of beam diameter |
| Profiles: | X ; Y or X&Y, lin. or log. display / 2D; 3D |
| Profile parameters: | beam diameter / Gaussian fit / Second moment beam diameter / Knife Edge / centroid / ellipticity / beam wander display |
| Update Rate: | 1-2 Hz depends on PC and scan range |
| Data analysis: | Pass/Fail, avaraging, standard deviation |
| Dimension: | see drawing / download |
We are happy to offer a free product demonstration within Germany/Austria/Switzerland. In case of interest please contact Laser 2000 by phone or mail to arrange a presentation.




 BeamScope P8, linear Scan